Pages

Friday, June 23, 2023

Quick little scrap project

Today I saw a post about making a thread catcher.  Something to keep near you when doing any sewing, but it comes in especially handy when doing hand sewing.  It gives you a place to put all your cut threads so they don't end up on the floor or all over your clothes.  The tutorial along with a video is on All People Quilt and I made two of them with scrap batting and scrap fabric.

Here is a link to the tutorial.

Thread Catcher

 And here are the two I made.  I "roughly" followed the sizes they used, but you can make them any size you might want or the size of your scrap batting.  I left the cardstock out of the second one, as I wanted it more flexible for travel and didn't want to have to bend the cardstock.  I don't know if it will matter either way, but wanted to try it both ways.  I used scrap batting and fabric for both.

This one I used card stock.


This one I just used batting and fabric.


I could have used one of these when we were on our trip and I was working on my hexagons.  I didn't have a place to put my cut threads, and so I just put them on the table, and cleaned them up later.  But a little square like this would have made it so much easier to keep them under control, and not get on the floor or on our clothes.  Now I have one to put into my hexi bag.   

The second one is going by my machine, so that when I have cut threads, instead of them ending up on the floor, because they just don't quite make it to the trash can, I won't have to worry about thread getting wrapped around the wheels of my chair, or around the head of the vacuum cleaner.

As easy as they are to make, if I find other places where I could use one, I can make them as needed, instead of taking them from one spot to use in another spot.

I hope you give this quick project a try, and if you do, share it with me, so I can see your thread catchers.

Until next time... Happy Crafting!!!


Thursday, June 22, 2023

A new project was started...

Last week, the hubs and I took a short road trip.  I wanted to take something with me to work on for the evenings when we were in the room after doing what ever we did during the day.  I have my tatting to work on, but I wasn't working on any particular project at the moment, and I didn't want to find a new pattern.  I decided on trying English Paper Piecing.  I bought the Accuquilt Qube for English Paper Piecing when they had a sale, and before they raised the prices, and it was time to try it out.
Now, why I thought buying a Qube to cut pieces to sew together by HAND was a good idea, I will never know.  I usually detest hand sewing and avoid it as much as possible.  But buy it I did, and so now I want to get some use out of it.

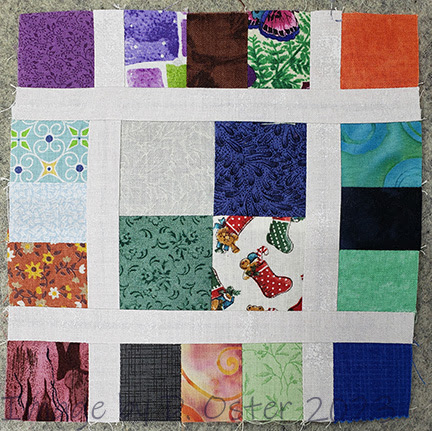
First I dug through my scraps to find something I wanted to cut up for practice.  I cut half hexagons and equilateral triangles, along with the papers to go with them.  I glue basted them, and sewed them together.  It wasn't too bad for a first attempt, but there is small spaces between some of the pieces.  I think if I were to applique it onto another fabric, it  would be fine, but it isn't something I would put in a quilt.

Of course, I had to make it harder on myself, using the wrong needles, and my Wonderfil Invsifil 100wt thread.  I didn't have any Milliners needles, so I used what I had, Sharps.  The sharps worked, but because they aren't as long, it was harder to grab the needle and pull it through all the fabric.  And 100 wt thread is practically invisible, but it is very strong.  I figured if my stitches weren't even, and I picked up too much fabric for my stitches, that thin thread may not show as much.  Well, I was right, it doesn't show much, but if you aren't used to working with such thin thread, it can be a bit fiddly.

After making that practice piece, I did a little research to find a free pattern I thought I would like to make for my first project.  I found a double ring flower, like Grandmothers Flower Garden, and thought that would be a great first project, and I could use some of my scraps and fat quarters.  I didn't want to make it as large as the pattern, so I opened up my Electric Quilt and went about designing a quilt in a size I thought I would be able to make.  I usually make lap sized quilts rather than bed sized quilts, and this one was going to need 55 double ring flowers, plus the background pieces.  The pattern calls for 111 double ring flowers.  If you want the pattern for yourself,  you can find it at Connecting Threads, along with other free patterns. Double Ring Hexagon Quilt Pattern 

Here is a picture of the quilt top.  According to the pattern it finishes at 86" by 110".


Now I have the pattern, and I have the means to cut my papers and fabric, it's time to get busy and start cutting.  I went through my scraps, and fat quarters looking for fabric I thought would work well. I found a half yard of a solid I decided would be my centers for all my flowers.  When I found a pair of fabrics, I cut 18 hexagons from each.  I could make two rings, 6 for the inner ring and 12 for the outer ring.  I could make two flowers using the same fabrics in each position, or mix up the fabric and use them with a different fabric in the second flower.

I cut enough pieces to make 20 rings, and started glue basting the pieces to my papers.  I decided on glue basting only because I have the glue sticks and I need to start using them, and I didn't want to do any more hand sewing than necessary.  I basted enough for 3 flowers, and took enough on our trip to baste 7 more.  I wasn't sure how much time I would have, or how fast I would get them made, but I didn't want to run out of something to do.


The person who wrote the pattern mentioned that she found it easier to sew the rings leaving one seam open, then add the center, so I thought I would try it. On my first ring, I sewed the inner pieces to each other leaving one seam open, then added the outer ring. Then I added the center and sewed the open seams. Here is a picture of sewing my first ring.
 
Here I started adding the outer ring.  This wasn't a bad way to sew them together, but the more hexies you add, it gets a little difficult to hold in your hand and be able to sew, with all the papers in the hexies.

And here is my final block with all the seams sewn.


As I was working on this block, I took a picture of it, and posted it on one of my Facebook groups for English Paper Piecing.  A member of that group told me it may be easier to stitch them together in 3's, then stitch those sets of 3 to the center.  So I decided I would try that on my next flower.  Although I don't have any experience making these rings, other than the first one I did, I thought sewing in 3's and then sewing to the center went much faster and easier.  You worked with just 3 hexies until it was time to sew them together, then you weren't having to fiddle with a larger piece to add one hexagon.  I liked doing it that way, and will probably continue doing that, until I find another way I like better.
Here is a picture of two sets of three, this is for block 3 (I didn't think to take a picture of them while I was sewing block 2).

Once you get all 6 parts of the "pie" sewn, then you sew to the center hexie. And this is block 2.


I haven't stitched any more blocks yet, as we came home a day early.  I did get more fabric and papers cut, and have 6 more blocks basted.  We are going on another road trip in Sept and again in Oct, and I want to make sure I have plenty of EPP (English Paper Piecing) blocks to take with me, so that I can work on something when we aren't busy doing other things.

While we were on our trip, I went to a quilt store, and was able to find the right needles, and having a longer needle to sew with made a huge difference, in how fast I was able to put the pieces together.  I also got thimble.  I was using just little leather dots, and they work okay, but I found it kept sliding and my thread would get tangled around the edges, so I bought one that covers my finger.  I do believe that having the right tools, make the job at hand easier, so I didn't mind spending some money to get better tools.  I also bought a Bohin Needle threader, and wow does it make a difference.  Just drop the needle into the hole, put the thread in the space it belongs, and press the button, and just like that, the needle gets threaded!!  The eyes of these needles are small so that needle threader makes threading your needles fast and easy.

One of the reasons I started to do EPP was to have something that is portable and easy to grab and take with me, if I'm going to have to be sitting some place.  I may not work on this as much when I'm home and can be using my machines, so I don't know how much progress I will be making if we aren't taking any trips.  However, if I keep some in the house, instead of in my studio, I can pick it up and work on something, when I can't be over in my studio.  

I'm already thinking about the next EPP project I want to work on.

Until next time...Happy Crafting!!!

Sunday, June 11, 2023

One small step...

 When ever I'm in my studio looking at getting everything organized, there is a Chinese proverb that keeps coming to my mind...

    "A journey of a thousand miles begins with a single step."

With that in mind, I know that if I can find a "forever home" for just one item a day, that is one item that I no longer have to deal with, and one step closer to my "journey" of getting my studio organized.  

Now, I usually can find a home for more than one item a day, as once I get started, it is easy to keep going.  However, there are days I don't want to work on organizing, and just want to sew.  So on those days, I will still find a "forever home" for something, then will do some sewing.  I know the more I work on getting things organized, the sooner I will get it done, and the sooner I can just go out to my studio and sew.  But sometimes, you need to take a break from organizing, and just have fun.

Even if I'm not finding "forever homes" for things, working on organizing my scraps, or fabric is still working on getting my studio organized.  So when I do spend the day organizing scraps, it might not look like I did much, if you look at all the stuff in my studio.  But getting my fabrics organized is part of the organizing I want to accomplish, so some days, I will work on scraps, and other days I will find a place to keep things.  In the end, the journey will get further along.  I'm not sure my organizing "journey" will ever be completely finished, as there will always be some tweaking or putting things away, that will need to be done with each new project I start.

Yesterday, I did get a lot more things organized, and in the afternoon, I spent the day getting some blocks for an old Leader & Ender project together to be sewn.  I found the blocks that I have already made, and the parts I have been using to make the blocks. I still need a lot more blocks to make the 4 quilts I have in mind.  I inherited some squares from my Mom when she downsized before she passed, and I'm using those to make Garlic Knot blocks from Bonnie Hunters Addicted to Scraps column.  The fabrics aren't the best quality for quilting, and I'm trying to use up as many of the squares as I can, with out supplementing with my own fabric.  But it's getting harder to find enough squares to get all the blocks I need made, with out using the really thin fabrics.

Here is the container I use to hold blocks ready to be sewn as Leaders & Enders.  As this container gets emptied, I will make more blocks, until I have all that I need for the 4 quilts. You can see the container of squares I have to pull from in the back. 


Once I get to where I can sew every day, this will get emptied quickly.  I have had to trim down some squares that weren't quite 2", so I make them 1.75" and am making 2 quilts with 6" blocks and 2 quilts with 5" blocks.  I may play around with the settings, and find a way to use fewer blocks and still get a good sized quilt.   I have 145 6" blocks made, with 19 more in my container to be sewn.  That should be all I need for the 2 quilts with 6" blocks.  The 5" blocks I have 62 blocks made, with 13 ready to sew.  I need 122 - 144 more depending on how I do the layouts, before I have enough of that size for the 2 quilts.  I will see how many blocks I can get made before I decide on which layouts I want to use for the 5" blocks.

With these blocks ready to be sewn, it's good motivation to get more organizing done, so I can spend more time sewing... so with that... I'm off to my studio to get something accomplished for the day.

Until next time... Happy Crafting!!!

Wednesday, June 7, 2023

Did a little sewing

Yesterday, I decide to take a break from organizing and did some sewing.
I may have mentioned I'm not a fast sewer.  I like to enjoy the process, and I don't like to be rushed. I don't make quilts for specific people or reasons, they are being made because I liked the block, or I wanted a challenge, or it was something to make to use up some of that fabric I have.

While I was still unpacking all my boxes, I hadn't found all my projects that were in progress before we left Colorado Springs, but I wanted to do some sewing once I got my cabinet and machine set up.  So I found a block I wanted to make, with what I had already unpacked, and decided on a block called Square Pegs.  It is from Bonnie Hunter's Addicted To Scraps column in the July August 2022 issue of Quiltmaker Magazine.
I had found my 1.5" and 2" squares, and pulled them out and started sewing them together.  I spotted the grey Grunge fabric and thought it would be perfect for the small sashing in the block and cut some of that.  Here are the first two blocks I have sewn together.  They will finish at 6".


I do have more parts sewn together, but they aren't blocks yet.

I'm not a big fan of sew alongs, or BOM (Blocks of the Month) type programs. I usually like to do my own thing, and at my own pace, and if I don't keep up with the group, I feel like I shouldn't be part of the group.  However, one of my groups for Accuquilt started a sew along that I thought might be fun to do.  It is actually something I have considered doing since I started using my Accuquilt, and that is to make one of every block in the 3 PDF files of 72 Blocks, that can be made with the Mix and Match Qube, and the Companion Sets, of Corners and Angles.  There are a total of 216 block (72 x 3 = 216).  Yesterday I picked out some scraps and cut the pieces for my first block.  I decided to start with the PDF for Corners, as I haven't used those shapes much at all.  There are 4 shapes in the set, and along with the 8 shapes in the Mix and Match set, you could probably make more than 72 different blocks.  I thought about picking a block that looked interesting, but then thought, if I am going to make one of each pattern, it will be easier to keep track of them, if I make them in order in the PDF file.  I can just look at the last one I made, and find it in the PDF and know the next one is the one I need to make. 
The "rules" for the sew along are easy... just make one of each block.  You can do them in any order, make as many or as few quilts from them as you want, use any layout you want for your blocks, and pick any size Qube you want to use.  The size of the Qube will determine the size of your quilts.  I choose the 4" qube, as I like working with small pieces, and I can use up some of my smaller scraps.  I also have the 6", 8", 9" and 12" Qubes or the equivalent sized dies for them.  (I didn't buy the 12" Qubes, because some of the same size shapes are in my 6" qube, and bought the individual dies of the shapes I didn't have).
I did the same with the 4" Qube, I had most of the shapes in the sizes needed, and just bought the ones I didn't have a die for already.
Here is a picture of the first block I made.  It's called Anvil from the Corners PDF.  This finishes at 4".
 
Once I get my studio more organized, I plan to make more than one a day,as I have time, but it will depend on what other projects I have going on, and how much time I want to spend on this one. 

Until next time... Happy Crafting!!!


Tuesday, June 6, 2023

The end is near...

Yesterday I unpacked the last 3 boxes that were in shed 2.  I still have to find homes for most of the stuff that was in them, but at least I know what was in them.  I have 3 boxes left in shed 2, that are the small size for books.  All my empty boxes got piled around them, so until we can get rid of the empties, they will have to wait.  I'm not in any rush to get to the books, I still have some room on my bookshelves, and I plan on culling out any books or magazines that I no longer want or need.  There is no reason to keep them if I'm not going to refer to them for anything. 

The 3 small boxes in my studio were opened, one was books, so they were added to my shelf. One had more Accuquilt dies in it, so those got put with the others, and the 3rd one, is files that need to come into the house and into my filing cabinet.  So the end of unpacking boxes is near. 

I also cleaned up a plastic drawer unit on wheels. I had to find a missing wheel, but there was one in my pile of "wheels" that I have been keeping until I found where they go.  Besides taking it outside to wash all the dirt off it, I took my Johnson's Paste Wax, and put it on all the black plastic parts.  It looks almost new now.  I hope that will help keep the dust and dirt to a minimum as I will never be able to stop the dirt from getting into my studio.
I think it will find a home under the wing of my cutting table.  If I have to put the wing down for some reason, it will be easy enough to roll it out of the way.  I'm not sure what I will store in there, I'm leaning toward scraps, as it would be handy to just toss them in there, and pull the scraps out as I want to use them.   The one on the left was put there a week ago, and what I have put in the drawers may change, but with both of them under the cutting table, I think they will work for storing and sorting my smaller scraps.  And there is room on top of them to put some project boxes for those I want to be working on, as they are close to my machine. 


The unit on the left is missing a drawer, and so far, I haven't been able to locate it.  Even with out one drawer, it is still useful, so if I can't find it, there is no reason to get rid of it if it works for me.  The decorative box on top of the left unit is scraps I need to cut down, and the project box is all the Garlic Knot blocks I have been working on.  I still need more of those blocks to make the 4 quilts out of them, and I need to wait until I get my design wall up to lay them out.  Once I find all the squares I have been using for those blocks, I will start making more of them.  I'm still looking for my dark squares, and I'm sure they are somewhere in this mess.


This next little drawer unit is under the pressing station that is part of my cabinet.  It is also on wheels and can be moved out of the way, if I need to put that back under the cabinet.  I am keeping 3 different projects that I'm sewing on currently, one in each of the drawers.  So all the pieces I need to make the blocks, and the completed blocks will live in those drawers, until the top is complete or there isn't enough room for them all.  Once one of these projects is complete, it will be replaced with the next quilt on my list. If I only have a few minutes to spend in my studio, I will have 3 projects with all the parts needed, so I won't have to search for something to work on. 

I was going to get rid of this unit, as the drawers never stayed in the runners, and were always falling down.  But I decided to give it another chance, and so far it's behaving itself.  I think I was storing stuff that was too heavy in it before the move, and that is what caused the drawers to come out.  I really don't like the units with the runners, and prefer ones that the drawers sit on runners underneath (like the ones under my cutting table), not a lip in the drawer on the top.


There is another drawer unit that you might have noticed behind my pressing station with the purple drawers, it also has the runners that a lip on the top of the drawer fit in, and I may end up getting rid of it.  Even with not much of anything in those drawers, they don't want to stay in the runners. I want things that work in my space, not things I have to fight with to get them to work right.  But I will give it some thought and see if there is something I can store in those drawers that won't be too heavy for them to work properly.  If not, it will be donated to a charity shop when we head into town.

Well it's time to get over to my studio and get some more organizing done for the day.
Hopefully I can also sneak some sewing in, and get some pictures of the blocks I have been working on when I do sew.

Until next time... Happy Crafting!!

Saturday, June 3, 2023

More boxes unpacked

 Yesterday it was time to unpack a few more boxes.  I had one in my studio that I thought was full of books.  I figured as I was emptying that box, I would look at each book, and decide if I still wanted to keep it or not.  Well, instead of books, it was mostly magazines. Going through those to decide if there were any patterns or ideas I wanted to note, would take longer than going through books, so they all got put on a shelf, to be looked at later.  I just didn't want to take the time to look through them, and get sidetracked on finding a new project I might want to do.  :-)

After I finished that box, I went to shed 2, and unpacked 6 more boxes.  I found more fabric, yeah!!! and I think I found most of what I knew was missing, but I still need to fold it all and get it on my shelves.  At least I have room for it after refolding all my fabrics.  I also found my box of accessories for my Solaris that I was missing.  So I was happy with that. 

I have a few more boxes that need to be unpacked, but first I have to get the rest of the fabric folded, and find homes for all the other stuff I unpacked.   So today I will be folding more fabric and adding the amount to my totals.  I'm hoping I can get the last of the boxes unpacked and find homes for everything before the end of June.  As long as I don't get sidetracked on something else that catches my attention, I should be able to do it.  But the tug of wanting to sew and start new projects is strong, and it's getting harder to ignore when I'm looking at all my fabrics.

Since I am not going to share the mess that is my studio right now, here is a picture from our trip to Hawaii in Feb.  I loved watching the waves splash against the rocks at the shoreline.


And of course who can resist this guy, just laying on the beach having a nap??


Until next time... Happy Crafting!!!


Thursday, June 1, 2023

I finished folding fabric...

 that was in the two bookcases!!!  I still have some room, although I'm sure I need more for what fabric is left to find.  I also have some fabric stacked on a chair that needs to be folded and put onto my shelves. 


I also moved my thread boxes onto a different shelving unit.  When I unpacked them, I put them in a third bookcase, but that was just to get them somewhere.  I need to get my threads reorganized, and I need to decide if they will stay in the boxes they are in, or if I want to find something that fits the shelves better. This is where they are going to live now, but I will probably move things around when I'm ready to organize my threads.


After I finish unpacking the rest of my boxes, I will know what I have, and what needs to fit somewhere, and will figure out if what I have works well enough or if I need something different.

With all the thread moved out of my bookcase, I have plenty of room for more fabric, and I think some of my project boxes can fit on the bottom shelves.

I'm happy with the progress I'm making to get things more organized in my Studio. 

The total of fabric I have counted so far is 700 yards!!!  And I'm not done yet.  I am going to need to get busy sewing and use up that fabric.  I should be able to spend some time sewing soon, at least for a few hours a day.  I have lots of scrap quilt patterns I want to start working on, so hopefully I can get some of that fabric off the shelves, and into quilts.  There is at least 12 One Block Wonder or 4 Patch Posy fabrics waiting to be made into quilts, and those take around 4 yards each, depending on the repeat of the fabric and not counting any borders or backing.  So I see some of those in my future.

Until next time... Happy Crafting!!!